You will need:
- Yarn: choose colors for skin (face and hands), robe (robe and trimmings) and hair.
- Crochet hook: make sure it fits the size of the yarn.
- Little jingle bell
- Safety eyes
- Stuffing (only for head)
- Embellishments (for instance: buttons)
- Needle and thread (to sew the buttons)
- Tapestry needle (to attach the amigurumi pieces together)
- Embroidery floss (optional, for embroidering mouth and/or eye lashes)
Abbreviations:
sc – single crochet
inc – increase (2 sc in 1 stitch)
dec – decrease (1 sc in 2 stitches)
Video Tutorial
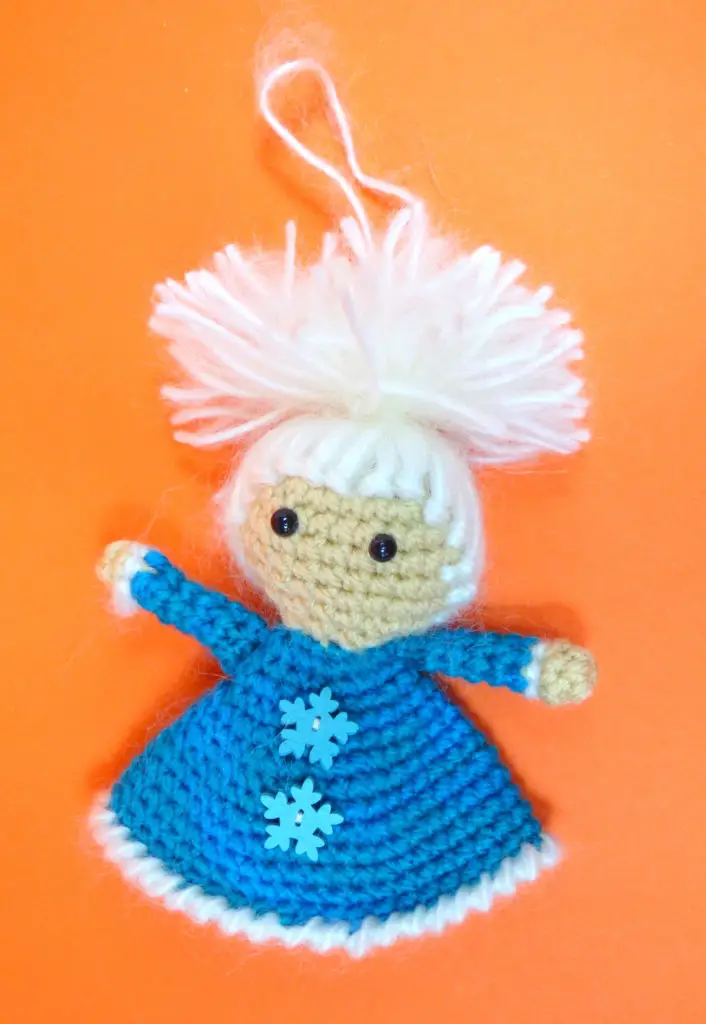
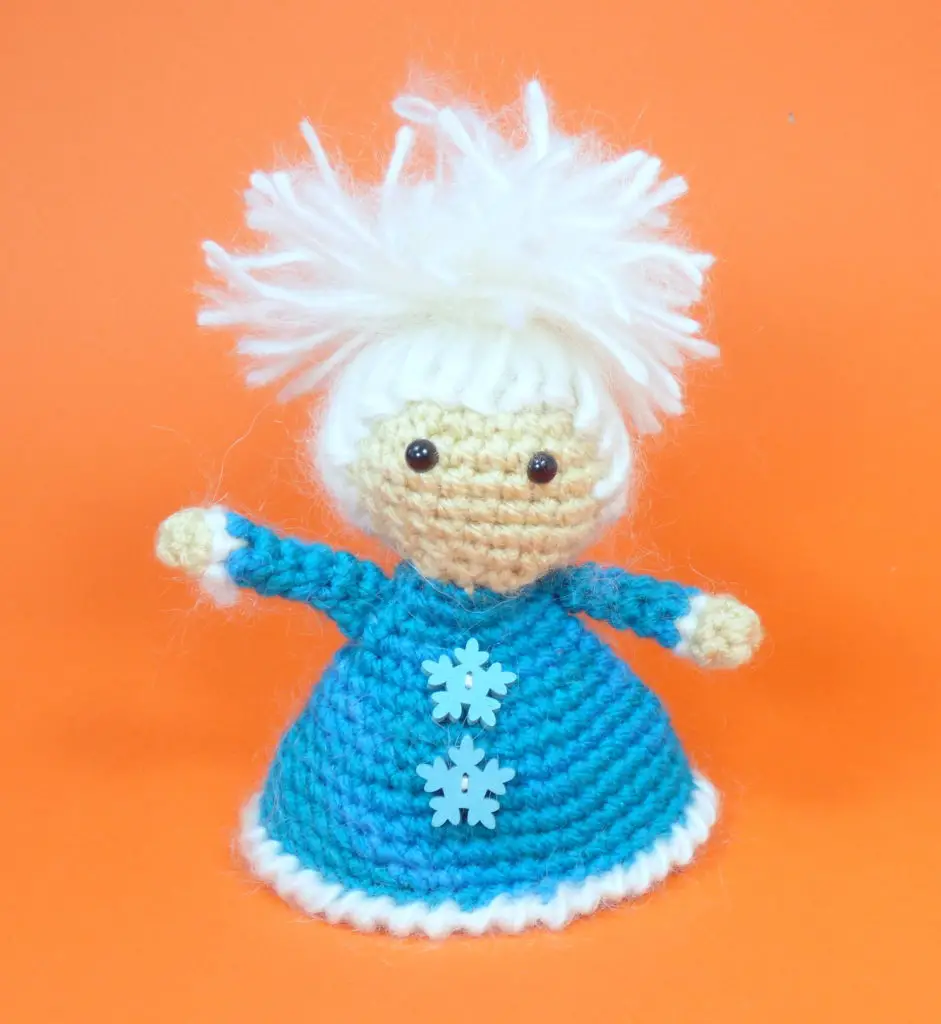
Head
With skin color:
Round 1: 6 sc in magic ring (6)
Round 2: inc in each stitch (12)
Round 3: (sc, inc) x 6 times (18)
Round 4: (2 sc, inc) x 6 times (24)
Round 5-8: 24 sc (24)
Round 9: (2 sc, dec) x 6 times (18)
Put in the safety eyes between round 5 and 6, about 4 stitches apart.
Round 10: (sc, dec) x 6 times (12)
Start stuffing the head.
Round 11: 6x dec in back loop of stitch (6)
Fasten off, leave a long yarn tail.
Sew the remaining hole shut.
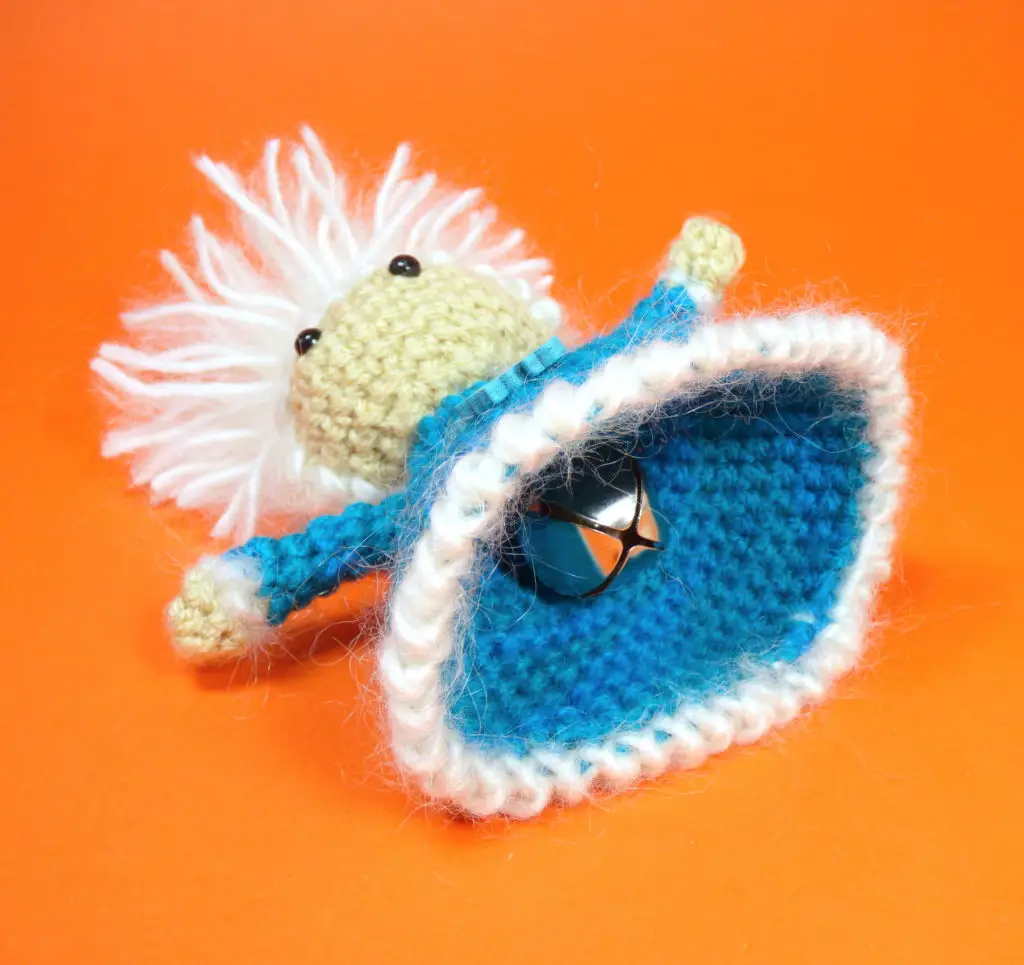
On the end of the head’s yarn tail, the bell will be attached later.
Robe
Continue with robe color:
Continue in the loops that were leftover in round 11.
Round 1: 12 inc (12)
Round 2: 12 sc (12)
Round 3: (sc, inc) x 6 times (18)
Round 4: 18 sc (18)
Round 5: (2 sc, inc) x 6 times (24)
Round 6: 24 sc (24)
Round 7: (3 sc, inc) x 6 times (30)
Round 8: 30 sc (30)
Round 9: (4 sc, inc) x 6 times (36)
Round 10: 36 sc (36)
Round 11: (5 sc, inc) x 6 times (42)
Round 12-15: 42 sc (42)
Fasten off. Weave in the ends.
Round 14 (optional): Create a border by reverse crocheting the trimming color yarn around (I have used the same yarn as the hair) (42)
Arms (make 2)
Start with skin color:
Round 1: 5 sc in magic ring (5)
Round 2: 5 sc (5)
Switch to robe color:
Round 3-8: 5 sc (5)
Don’t stuff the arms. Sew them in the appropriate place.
Embroider some trimming yarn around the wrist. I used the same yarn as the hair.
Hair
Cut up your hair color yarn into double the length of the hair you want. When in doubt, make the yarn strands a little longer – you can always give your angel a hair cut!
Knot the yarn strands to the head where you want them to be. I’ve opted for an updo (ponytail) which means knotting the yarn strands around the hairline is enough, especially if you double up the strands per knot.
Create your hairstyle: in this case, I created the ponytail using a little piece of hair yarn. This way you can leave the yarn ends in the hair itself.
If you want give your angel a little hairband or tiara or some other form of hair accessory!
Finishing Touches
- Sew the jingle bell to the long yarn strand that was left over by the head! Make sure that the bell disappears under the robe, that is, unless you like the bell hanging out of course!
- Sew on the buttons (or other embellishments) to your angel’s robe.
- (Optional) Attach a little loop to your angel’s head for hanging in your Christmas tree. I used the hair yarn. This way the loop “disappears” when you don’t use it.
- (Optional) Embroider a little mouth and/or eyelashes.
- (Optional) If you like your angel to have wings, cut some wings from felt and attach them to your amigurumi!
Congratulations! Your little angel is all done!